3D Learning Modules
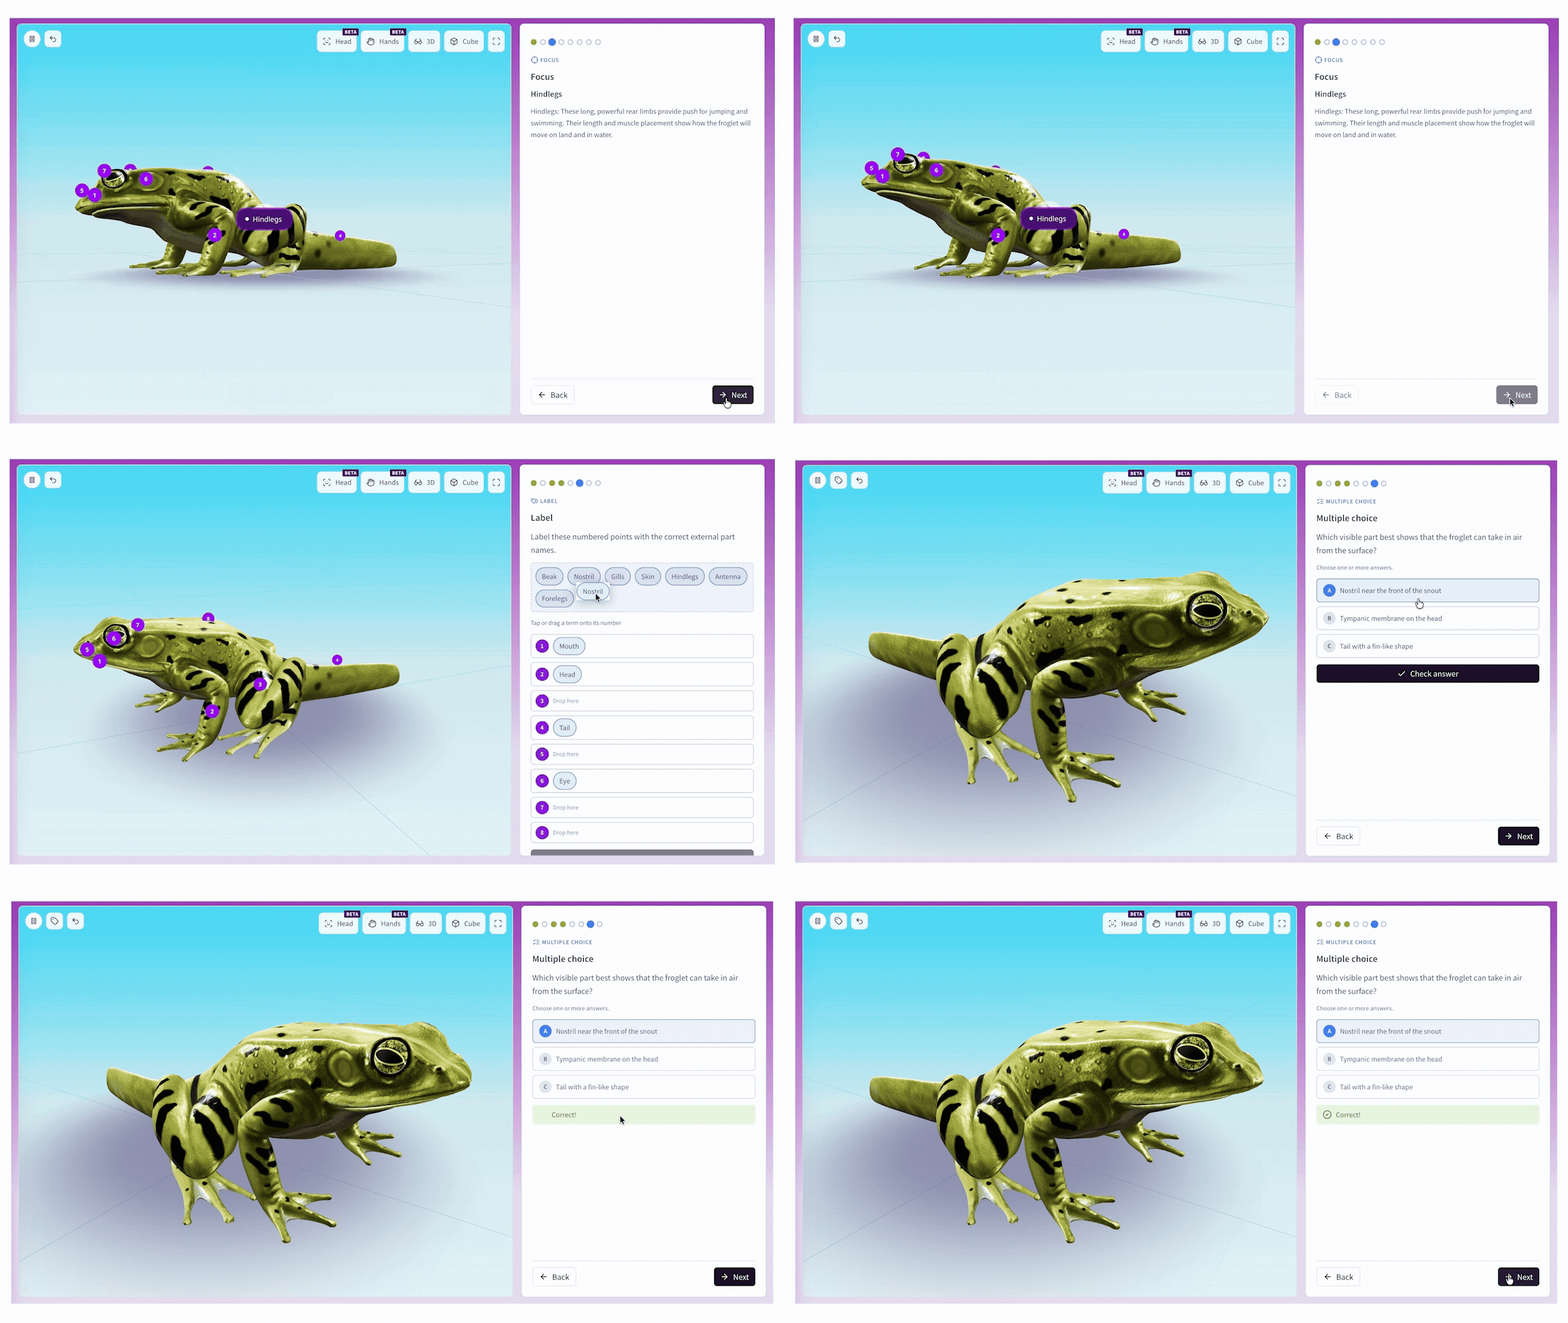

3D Learning Modules let teachers turn a single 3D object into a self-guided lesson and then assign it to students! After the student has completed it, you can then review student progress and responses.
AI assistance is available to create the 3D Learning Module, but it is not required.
This help article will show you how to create and assign a 3D Learning Module, then review once students have completed it.
- Create: Choose a 3D object and build the lesson steps yourself or start with an AI-assisted draft.
- Assign: Assign the lesson to an entire class or course, a specific student, or send to anyone using a link.
- Review: See who started and finished, review answers, and give feedback on student work.
- Share: You can share the Learning Module with your school so other teachers can send to their classes as well.
3D Learning Modules are only available to teachers with a Merge EDU - Class, Course, or School subscription. It is not available for Lab Subscriptions or Creator-only licenses.
How to Create a 3D Learning Module:
- Sign in to https://dashboard.merge3d.ai/.
- Tap Apps from the side menu, then select Viewer.
- Select the 3D object you want to use for the 3D Learning Module. Search for the object by name or browse as desired.
- Once you select the object, tap Create Module. For this example, I have selected the Life Cycle of a Frog object.
- Fill out as much information as possible to set up the module. You can use AI to help fill in the information. More on this below.
- Title: Keep it the same as the object name or customize it
- Description: This will be shown on the assignment
- Grade Level: Add grade level for on-level accuracy
- Standards: If you have not yet set your curriculum, NGSS is the default. To set your curriculum from here, you can tap “change” then select your standards from the drop down menu.
- Learning Objectives: Concise statement that describe what a learner should know, understand, or be able to do by the end of the module.
- Anything else: Optional; you can add more detail here.
To use AI assistance:
- Suggest details - fills in the blanks and polishes what you already wrote.
- Generate a draft - builds the lesson for you.
3D Learning Modules use about 6-10 AI credits each, depending on if you used it to suggest details or generate the draft. Learn more about AI Credits here.
For No AI Assistance: Simply choose to Skip and build it yourself.
-
Once you choose “Skip and build it yourself” or “Use AI to Generate a draft” you can finish building out the lesson.
-
DETAILS - The details tab allows you to edit information already added, and also add additional information:
- Wrong Answers - Allow the students to try again or give them only one attempt to answer correctly.
- Vocabulary - Edit or add vocabulary words and their definitions.
- Common Misconceptions - this helps shape the hints and feedback students receive during the lesson.
- LABELS - The labels tab allows you to add, remove or edit labels on the object. You can drag to reorder them as well.
-
STEPS - Students will work through the steps in order they appear. You can add in different activities into each step:
- Instructions - text an optional media that student reads
- Explore - free rotation with a time, angle or label goal
- Focus - camera focuses on one label w/ explanation
- Identify - student taps the correct label
- Label - students place names on labels
- Multiple Choice - students will pick the right answer
- Short Response - written answer you grade or AI can grade it for you - teachers can always override AI grading
- LANGUAGES - Optional. Add a language, then choose Edit. Line edits happen in that dialog. Auto translation asks before it replaces anything you typed.
-
DETAILS - The details tab allows you to edit information already added, and also add additional information:
- Be sure to SAVE your draft once you have completed it!
-
Now it’s time to PREVIEW your 3D Learning Module! Tap “Preview” from the upper right corner to see the preview screen.
- Tap “Next” to walk through the module like a student.
- Tap “Back to editor” if you would like to make changes.
6. After the Preview is done, you can “Review steps” which will take you back through the Preview again, or go “Back to editor” to make changes or share.
7. Be sure to press “Save” again if you have made any changes.
How to Assign or Share a 3D Learning Module:
- Sign in to https://dashboard.merge3d.ai/.
- Tap Tools from the left side menu, then select 3D Learning Modules
- Tap the 3D Learning module that you would like to Assign or Share.
- To assign the learning module, tap the “Assign” button. Then select the Classroom, Course or Student you would like to assign it to by selecting from the dropdown menu. Alternatively, you can get a Share Link to generate a link and QR code. You can also add a due date, but this is optional. Once you have selected the recipients, tap Assign.
- Reminder: Viewing and completing a 3D Learning Module requires a signed-in Merge account. Lab sessions cannot open 3D Learning Modules.
- To Share a 3D Learning Module with your school, simply tap the “Share with school” option, and all teachers with Merge EDU access on your campus (through your Course, Class, or School subscription) will be able to view and share your 3D Learning Module with their students as well!
How a Student Finds and Submits the Assignment
A student can easily find the 3D Learning Module you assigned. They simply sign into dashboard.merge3d.ai, and they will see it right on the home page under “Your assignments." They simply tap to select it.
After completing the 3D Learning module, they simply tap “Submit.” Multiple choice and matching questions will be graded immediately. Short answers can be graded by the teacher or by AI.
After the submission, students will see the “submitted” screen where they can see their grade.
If there were short answers that the teacher needs to grade, students will see “Written answers will be graded by your teacher" on the screen.
Note: You can grade short answer items, or set the AI to grade it for you. Teachers can always override AI grading.
How to Review and Provide Feedback to Students
After students complete the learning module, it’s easy for you to check on progress! Simply find the learning module you assigned (select 3D Learning Modules from the home page) then tap “Results.”
On this page, you can see each student by name, see the assignment status, the score if completed, the time they took to complete it, and you can view their responses.
How to Provide Feedback
To provide feedback to your student, simply tap “View Responses.” Here you can send a note to the student, and provide an optional enrichment link.
If a student performed poorly on the assignment and you want them to try again, tap “Return.” It will become an active assignment in the students dashboard again.
If you want to accept the student work as-is, tap “Accept.”
Now that you have learned all about creating, assigning, and sharing 3D Learning Modules through Merge EDU, read this overview of the Merge Creator Suite to see how students can show their learning through creation!